Winter is coming – Insulate your Attic to Fend off the Cold Rush
Another DIY weekend project from Insulfoam®
Whether you’re ready or not, winter soon will rear its cold and drafty head. Unfortunately for the unprepared, dreaded heating bills also come with the season. The typical single-family home in the U.S. pays an average of over $2,000 in energy bills each year, according to the U.S. Department of Energy (DOE). If you are one of the millions of people faced with these painful expenses, you can get ahead of the problem this weekend by taking some simple steps toward improving your home’s energy efficiency.
Making your home more energy cost effective doesn’t require a hefty price tag from a full remodel. Easy, DIY insulation options can help you increase your home’s insulation power and decrease your energy bills. For example, read our blog post about insulating your garage door. Insulating your garage will go a long way toward increasing your home’s energy efficiency. Another area that may need attention is your attic.
Do I Need More Insulation in my Attic?
If the insulation in your attic looks like a cotton candy machine exploded, that is what is called “loose-fill” insulation. Many contractors and homebuilders use this insulation because it is easily blown into attic spaces. Such insulation is not always the most effective means of making an energy-efficient home, as it is difficult to ensure uniform coverage across the attic surface. In addition, this insulation often settles over time, which means it will need another layer added to it to regain its insulating efficiency.
Identifying the need for more insulation in your attic is crucial to determining if your home is winter-ready. To do this, look across the open span of your attic. If the loose-fill insulation covering the floor of the attic or fiberglass batt insulation in the roof rafters is level with or below the floor and rafter joists, your attic is not winter ready and you are likely losing heat through your roof. If you cannot see any of the joists in the floor because the insulation is well above them, or cannot see any sags or gaps between the batts in the rafters, you probably have enough insulation and do not need to add more. It is important that the insulation be evenly distributed, with no low spots; sometimes there is enough insulation in the middle of the attic, but very little along the edges.
Luckily, you can insulate your attic this weekend without the fuss of fiberglass splinters or hiring an insulation service.
The DIY Option
One of the most efficient ways to increase your attic’s insulating power on your own is to focus your efforts on the knee wall and rafters. Before starting your project, consult your local building codes. After you have checked the codes, ensure that your attic is air sealed. The Environmental Protection Agency (EPA) recommends this as a key step to maximize your energy savings.
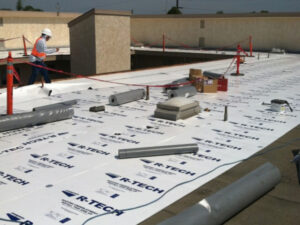
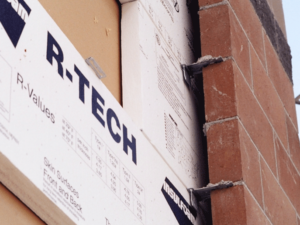
Next, take a trip to your local home improvement store to pick-up your 4’x8’ R-Tech rigid expanded polystyrene (EPS) boards. These energy-efficient foam boards are engineered to provide long-term moisture resistance and high-end insulating performance on a budget.
Prior to installation, measure the attic’s knee wall and rafter height and pre-cut the boards to fit with a minimal air gap between the border of the rafters and the boards’ edges. Cut the boards using a table saw or straight edge and knife to ensure accuracy. Install the boards with the reflective facer showing, and fasten them with a cap nail or screw, placing fasteners approximately 12” on center. When you are ready to install subsequent boards, ensure all edges are pressed tightly together to reduce air leakage. Repeat this process until the rafters and knee walls are covered.
Note: One layer of EPS insulation typically will suffice for the attic, as EPS has a higher R-value per inch compared to loose-fill or fiberglass batt insulation.
To see how to do this, watch our installation video.