A Quick DIY Insulation Project to Lower Your Energy Costs
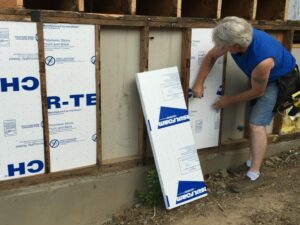
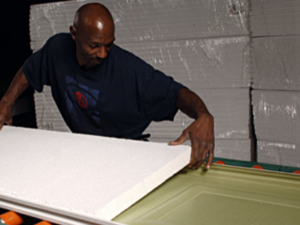
When insulating unfinished attics, DIYers often overlook attic access doors, which can create a gap in residential insulation even when fitted properly. Given that small gaps have a significant impact on a home’s thermal performance, homeowners can help shore up their home’s energy drains by building an insulated cover box for their attic access door out of expanded polystyrene (EPS) rigid insulation board. Not only does EPS have high and stable R-value, it is also easily customized to fit the exact dimensions of any attic door, making it an ideal material for this project.
Insulated cover boxes align with the Department of Energy’s (DOE) recommendation that homes should be properly insulated from the roof down. They provide a greater air seal around the attic door while also accommodating the fold-up stairs, which would otherwise knock an EPS panel away from the door.
For this DIY insulation project, homeowners will need a tape measure, flashlight (for attics without lights), cutting tool (like a saw or utility), sealant tape and at least one EPS rigid insulation board.
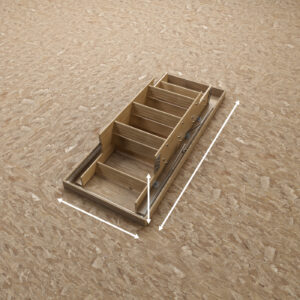
Step 1: Measure the dimensions of your attic access door.
Step one: measure and measure again
Because the main goal of this DIY project is to eliminate gaps in insulation, accurate measurements are key. Homeowners will get the most accurate measurements if they are inside the attic with the ladder folded and the hatch closed. First, measure the perimeter of the attic access hatch. This will provide the width and length of the insulated cover box. Then measure the height of the folded ladder for the box’s depth.
While DIYers will want a tight fit, it is important to provide enough space so the ladder will not damage the EPS rigid insulation board. Adding an eighth of an inch to the box’s depth should provide enough leeway without compromising the box’s home insulation benefits.
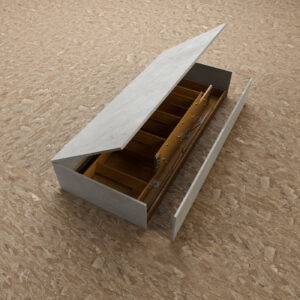
Step 2: Cut your rigid foam insulation boards and stage the pieces to confirm they fit correctly.
Step two: cut and assemble the rigid insulation board
After measuring, homeowners can easily cut the EPS foam to their measurements with common household tools, such as a table saw or a straight edge and knife. At this point, it may be beneficial to do a dry-fit by placing the pieces together around the closed attic hatch door.
If everything is snug, homeowners can assemble the box using the sealant tape around the outside and inside corners. When taping the box together, DIYers should layer the sealant tape horizontally and vertically to maximize the seal and structural integrity of the box.
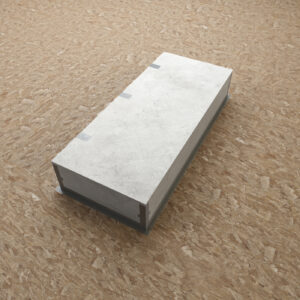
Step 3: Assemble your attic access door insulation cover and seal the pieces of rigid foam insulation board together with seam tape.
Step three: seal and install the insulated cover box
Because EPS rigid insulation boards are light, adding a little extra weight to the top corners can help ensure the box creates a seal. That said, this box will need to be moved to provide access to the attic so DIYers should not add more weight than they are comfortable lifting.
Homeowners can either simply install the cover box as is by placing it over their attic access hatch and shutting the door, or they can add weather stripping to the bottom edge to increase its seal. DIYers can also add hinges or springs to keep the box in place, but they are not required.
A simple project that yields results
This residential insulation project eliminates gaps in insulation to reduce energy consumption and to help keep living spaces more comfortable in colder and warmer months. That said, while building a cover box out of EPS rigid insulation board is an excellent first step in shoring up a home’s energy drains, homeowners should also consider adding EPS panels to the walls and ceiling of their attic for even greater energy savings.
Check out more energy-saving DIY insulation solutions from Insulfoam at: https://www.insulfoam.com/diy-insulation-kits/.
