Deck the Halls with Boughs of Foam
 Insulfoam DIY Insulation Kit Holiday Project
The holidays are upon us, and decorations are out in abundance. Some of these decorations have been passed down from generation to generation, some were bought on memorable occasions and some were “accidentally” left behind by relatives. Wherever they came from, holiday decorations play an important role in family traditions during this season, especially tree ornaments.
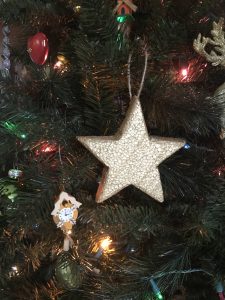
These little orbs and figurines represent childhood firsts, family vacations and little moments that resonate the spirit of the holidays. Unfortunately, the ornaments that are the most precious and delicate are typically susceptible to cracking and breaking. Make your ornament last through each generation by starting a new tradition this year and create your own foam tree ornaments with a DIY Insulation Kit from Insulfoam.
Don’t let the name mislead you, DIY Insulation Kits include Expanded Polystyrene (EPS) foam boards that are non-toxic and free from the itchy fiberglass shards. While EPS is commonly used in walls, roofs, and underground for its insulating properties, this material is great for crafting one-of-a-kind ornaments that will last throughout the seasons. If you need some help getting started, pour a cup of hot cocoa, turn on the festive tunes and try our simple DIY star ornament tutorial.
DIY Star Ornaments
Materials: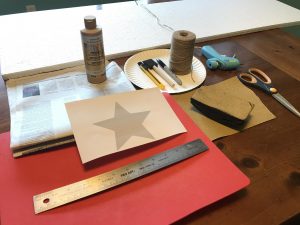
- Insulfoam DIY Insulation Kit
- Permanent marker
- Star template (found online)
- Scissors
- Hot knife foam cutter, utility knife or serrated knife
- Hand-held wood file
- Straight edge
- Fine-grit sandpaper (recommend 100 grit)
- Cardboard or protective layer for cutting
- Acrylic paint; color of choice
- Fishing line, twine or yarn (about 4 inches per ornament)
- Hot glue
Instructions:
-
- Find a star template online. Pinterest is a good place to find free ornament templates, but a quick online search will also work. Print out the template as big or as little as you would like your ornament to be. Then, cut out the outline of the template.
- Remove a board from the DIY Insulation Kit and place it on a flat surface. Pro tip: Remember to put cardboard or a protective surface underneath the board before making any cuts.
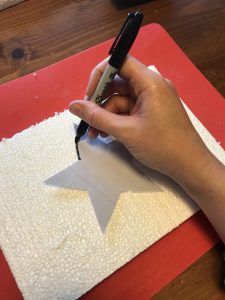
- Place your template on the EPS board and, using the permanent marker, trace along the outer-edge of the star. When you have successfully traced the outline of the template, remove it from the board. Pro tip: to get the most stars out of the EPS board, place the template in a corner of the board first.
- When you are satisfied with your template on the EPS board, clear a safe area around the board. Using the hot knife or serrated knife, carefully cut along the lines you drew.

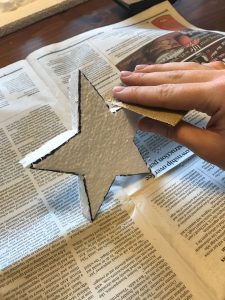
- After your “star” is cut free from the rest of the board, carefully use your utility knife, straight edge and hand-held files to clearly define the points and edges of the star. Watch this video for a clear example (:31). Pro tip: If you are not getting the precise shape you want from cutting the foam, use a fine-grit sandpaper to lightly “sand” the star’s edges.
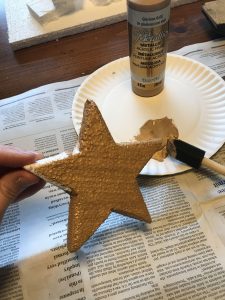
- Now that you have a beautiful star, select the desired paint color and begin painting. Acrylic paints work best with EPS, but if you would like to use other paint methods, be sure to first use a water-based primer.
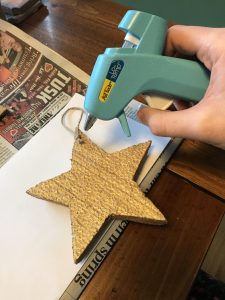
- After the paint has dried, cut a 4-inch length of fishing line, twine or yarn from its spool and bring the ends of the line together to form a loop. Using the hot glue, apply a small dot of glue to the “back” of the star. Lay the ends of the material onto the hot glue with the “loop” of the line pointed toward the “top” of the star. Let the glue dry before you hang the new ornament on the tree.
If you looking for more DIY EPS crafts for the holidays, consider one of these unique ideas:
- Large Foam “gift boxes” to decorate your outdoor spaces
- Front door snowman to decorate your entryway
- Model train set scenery
- Foam gingerbread houses (small)
- Foam gingerbread house (large) – make a winter fort! Read stories or play games inside.
- Homemade wreaths
- Foam advent calendar
- Holiday foam bird house
- Santa’s sleigh foam model
- Foam snowballs for an indoor ‘snowball fight’
- Foam Christmas tree